
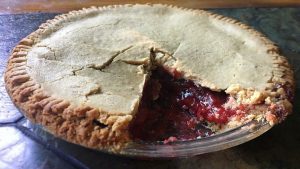
There’s nothing quite like throwing on an apron and putting together a beautiful homemade Strawberry Pie!
This pie is everything you want in pie but without the dairy, eggs or gluten! You would never know by tasting it though! The crust is buttery, flaky and has a delicious taste of almond from the almond flour.
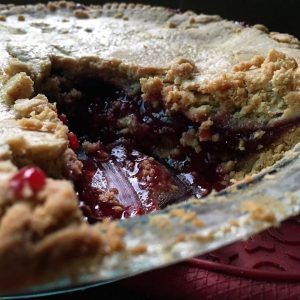
The strawberry filling is remarkable on it’s own. It’s so simple and quick to put together! It literally takes just 5 minutes and only 5 ingredients to make!
Strawberry Pie (V/GF)
This pie recipe is a game changer! The crust is buttery, flaky and has a delicious taste of almond from the almond flour. The strawberry filling is fresh and deliciously sweet. You'd never know that this pie is vegan AND gluten-free by tasting it!
Crust Ingredients:
• 1 1/2 cups + 2 tbsp gluten free all-purpose flour (plus more for rolling dough)
• 1 1/2 cups + 2 tbsp almond flour
• 1/2 teaspoon of salt
• 1 tsp of coconut sugar
• 1 cup coconut oil, chilled and solid
• 4 tbsp of ice water
Strawberry Filling Ingredients:
• 3 3/4 cups chopped fresh strawberries, stems removed
• 6 tbsp pure maple syrup
• 3 tbsp lemon juice
• 3 tbsp water
• 1 1/2 tsp vanilla
• 3 tbsp corn starch mixed with 3 tbsp water
Instructions:
1. In a food processor, combine both of the flours, salt and coconut sugar. Pulse until mixed. Chop up the chilled coconut oil and add it to the processor. Pulse until it becomes crumbly (the size of peas). Next, add the water and process until the dough forms into a ball.
2. Split the dough into two balls, wrap in plastic wrap and refrigerate for 30 minutes to an hour.
3. In the meantime, make the strawberry filling.
4. In a medium sauce pan, add strawberries, maple syrup, lemon juice and water. Bring to a boil.
5. Once it boils, add vanilla and corn starch mixture. Reduce heat and let cook until mixture thickens, about 3 minutes.
6. Remove from heat and set aside to cool and thicken more.
7. Remove the balls of dough from the refrigerator. Roll out the first ball on a floured surface until it’s about a 1/4-inch thick. I usually work the dough for a while with my hands and then finish up with a rolling pin. You may need to add more flour to the surface as you go. You can also run flour on the rolling pin if the dough is sticky. Also, adding flour on the bottom of your hands will help with handling and rolling the dough.
8. Repeat the last step with the second ball of dough.
9. Lightly grease your pie pan and then transfer the first piece of rolled out dough to the bottom of the pan. Then, pour the pie filling over the top of the crust. Smooth it out with a spoon or rubber spatula. Then, transfer the second piece of rolled out dough on top of the whole pie.
10. Smooth out any cracks with your fingers. Then, trim the edges of the pie with a knife so no crust is spilling over the edges of the pie pan. Then, seal the edges by gently pressing down on the dough with a fork.
11. Freeze the pie for several hours. (I recommend making it before bed, freezing it over night and then bake it in the morning ?)
12. Bake the pie in a preheated oven at 375 degrees F for until crust is slightly golden, about 60-75 minutes.
13. Let cool completely before serving. Enjoy! Store leftovers tightly wrapped at room temperature for up to a week.
Tips:
- When rolling out the dough, you can put down a piece of parchment paper, sprinkle it with flour and roll out the dough in there. This also makes it easier to transfer the dough to the pie pan. Just pick up the parchment palate, making sure the dough doesn’t crack, and flip it over into the pie pan. Smooth out any cracks with your fingers.
- To avoid burning the edges of the pie, line the edges with foil up until the last 15 minutes of baking.
Like this recipe? Then you’ll love my Rhubarb Pie and my Cherry Pop-tarts!
I’d love to hear what you think of this recipe! Drop a comment, rate the recipe and tag @bunnysbite on your Instagram and Facebook photos! (: